Speedrunning is neat because it offers an incentive for replaying a game. Often, a second playthrough loses some of the charm of the first because you already know what to expect. You've already had the epiphanies. But speedrunning gives you an excuse to play the game in a different way. Now you make the rules (or, well, a community that manages a leaderboard makes the rules). And then there's the fact that many games have multiple categories to do runs in, giving you even more ways to look at the game and practice and have fun.
The Witness is no exception. It's a versatile game, and there are plenty of goals you can come up with, which exist on a sliding scale of "reasonable" to "how did you even think of this". It all just depends on how creative you are. I've been known to set bizarre goals in games before, like when I basically turned catching Raikou and Mewtwo in Pokemon FireRed into puzzles.
yr dedication to making games rly hard awes me
— 🇰🇷3 springrolls please✡️ (@shirAdrenaline) March 20, 2020
Today, I'm going to talk about a category called Minimum Right Clicks.
Okay, it's actually called Minimum Manual Solve Mode Exits. And it's actually four categories. Let me explain.
Table of Contents
Introduction: What is Minimum Manual Solve Mode Exits?
There's a concept in speedrunning called a Low% category. Most games have an Any% (beat the game as fast as possible) and a 100% (beat the game as fast as possible while making sure that you've gotten all of the things). Low% is the opposite of 100%. It's "beat the game as fast as possible while also getting the fewest things possible".
At first glance, this might seem like the same thing as Any%. Getting fewer things has to be faster, right? But that's not always the case. There's plenty of times in games where picking up additional things can save time, like keys that open shortcuts, or strength-enhancing items in RPGs. In a Low% category, it doesn't matter that picking up that key would save you from having to walk the long way in and out of some building over and over again. A slower time with fewer things gotten is better than a faster time with more things gotten.
In The Witness, the thing you're trying to minimize is usually your solve count. We have a 7 Lasers Low% category, an All Lasers Low% category, and an All Discarded Panels Low%, the latter of which is a category extension of a category extension. Fun! All three of them just involve doing the parent category's goal, but in a way that minimizes the number of panels you solve, and in all three cases, this wildly changes the route and the tricks you have to do. All Lasers Low% in particular is an infamously difficult category, involving multiple difficult snipes as well as advanced usage of the boat while it's invisible.
The categories I'm talking about today are a type of Low% category, but the number we're minimizing is different, so we don't actually use the name "Low%". In Minimum Manual Solve Mode Exits, we're trying to minimize, well, manual solve mode exits.
Okay, well, what's that? In The Witness, there's two states you can be in: 3D and 2D. We call the 2D state "solve mode", because that's when the cursor is present and you're able to draw puzzle solutions. You enter solve mode by left clicking or pressing Space (or something else on controller, idk, controller is not optimal for speedrunning this game). Then, there's a handful of ways to exit solve mode, which we classify as either "manual" or "automatic".
Here's a list of things we consider "manual solve mode exits":
Right clicking
Pressing Space
Moving backwards, if you're snapped into a panel
It makes sense why these are considered "manual": they're actions with the specific, singular goal of exiting solve mode. Doing any of these plays a sound effect that's sort of the opposite of the sound effect that you hear when entering solve mode.
On the flip side, the game sometimes kicks you out of solve mode without you having to do one of those things. For instance, when you start a new file and you're in the tunnel, the first thing you do is walk up to the straight line panel and solve it. The left click that completes the solution and opens the door also kicks you out of solve mode. But if you try to do that panel again, you'll stay in solve mode this time.
The rules for getting an "automatic solve mode exit" are a bit more complicated than those for the manual exits. This is what we know automatically kicks you out of solve mode:
Solving a panel for the first time, if it's a solitary panel or the last unsolved panel in a set
Panels with erasers on them will never kick you out of solve mode
Swamp Island Control only kicks you out of solve mode if you've opened the laser shortcut door
Mountain Blue 1 and 2 only kick you out on New Version
Fully solving a video seek panel (not the input panel) in the Theatre will kick you out of solve mode even if the panel has been solved before. Partial solves will not do this.
Solving an EP, even if it's been solved before
Clicking an audio log, even if it's been used before
If you exit solve mode by doing one of these things, the exit sound effect will not play. This is important, because it's the real way to distinguish between a manual and an automatic solve mode exit. If you hear the sound effect, it was manual, and if you don't, it was automatic.
There is an exception to that, however. There's one way of exiting solve mode that doesn't neatly fit into either of these categories: loading a file. The game will always load in the 3D gameplay state, even if it saved while in solve mode. This means that you can either pause and reload your file, or just straight up quit and reopen the game, and when the file finishes loading you will be in the same location as before but not in solve mode.
For the sake of this category, we consider this a manual solve mode exit, even though the sound effect does not play. Being able to reload the file specifically with the intention to exit solve mode would defeat the point of the category because it can be slotted in for any of the other manual exit actions. Of course, there's an exception to this exception, but I'll get into that later.
I'll also note that I'm specifically going to be talking about Windows, although the stuff I say about Current version is going to apply equally to the macOS port. I have not researched how solve mode works on any of the console ports, namely because I do not have them. The iOS port, however, is explicitly banned, because every interaction with a panel gives you an automatic solve mode exit. Solving a panel with erasers, solving a panel multiple times, solving a panel within a set; even inputting an incorrect solution will kick you out of solve mode on iOS. This pretty clearly goes against the spirit of the category, so it will be ignored.
So now that I've spent 100 hours explaining Low% and manual vs automatic solve mode exits, it's time to put them together. Let's talk about how to minimize right clicks. By the way, I'd also like to give a major shout-out to IHNN for helping find a lot of the strategies for skipping right clicks! Coming up with this madness was a team effort.
Basic Strategies
There's a few categories that we can apply our restriction to: 7 Lasers, All Lasers, and All Panels. We've always gotta talk about 7 Lasers first, because it's the default way to play the game. It's also one of the shorter runs, so it's a good way to dip your toes in the water before diving in fully. That being said, that doesn't mean that 7 Lasers Minimum Manual Solve Mode Exits is going to be trivial.
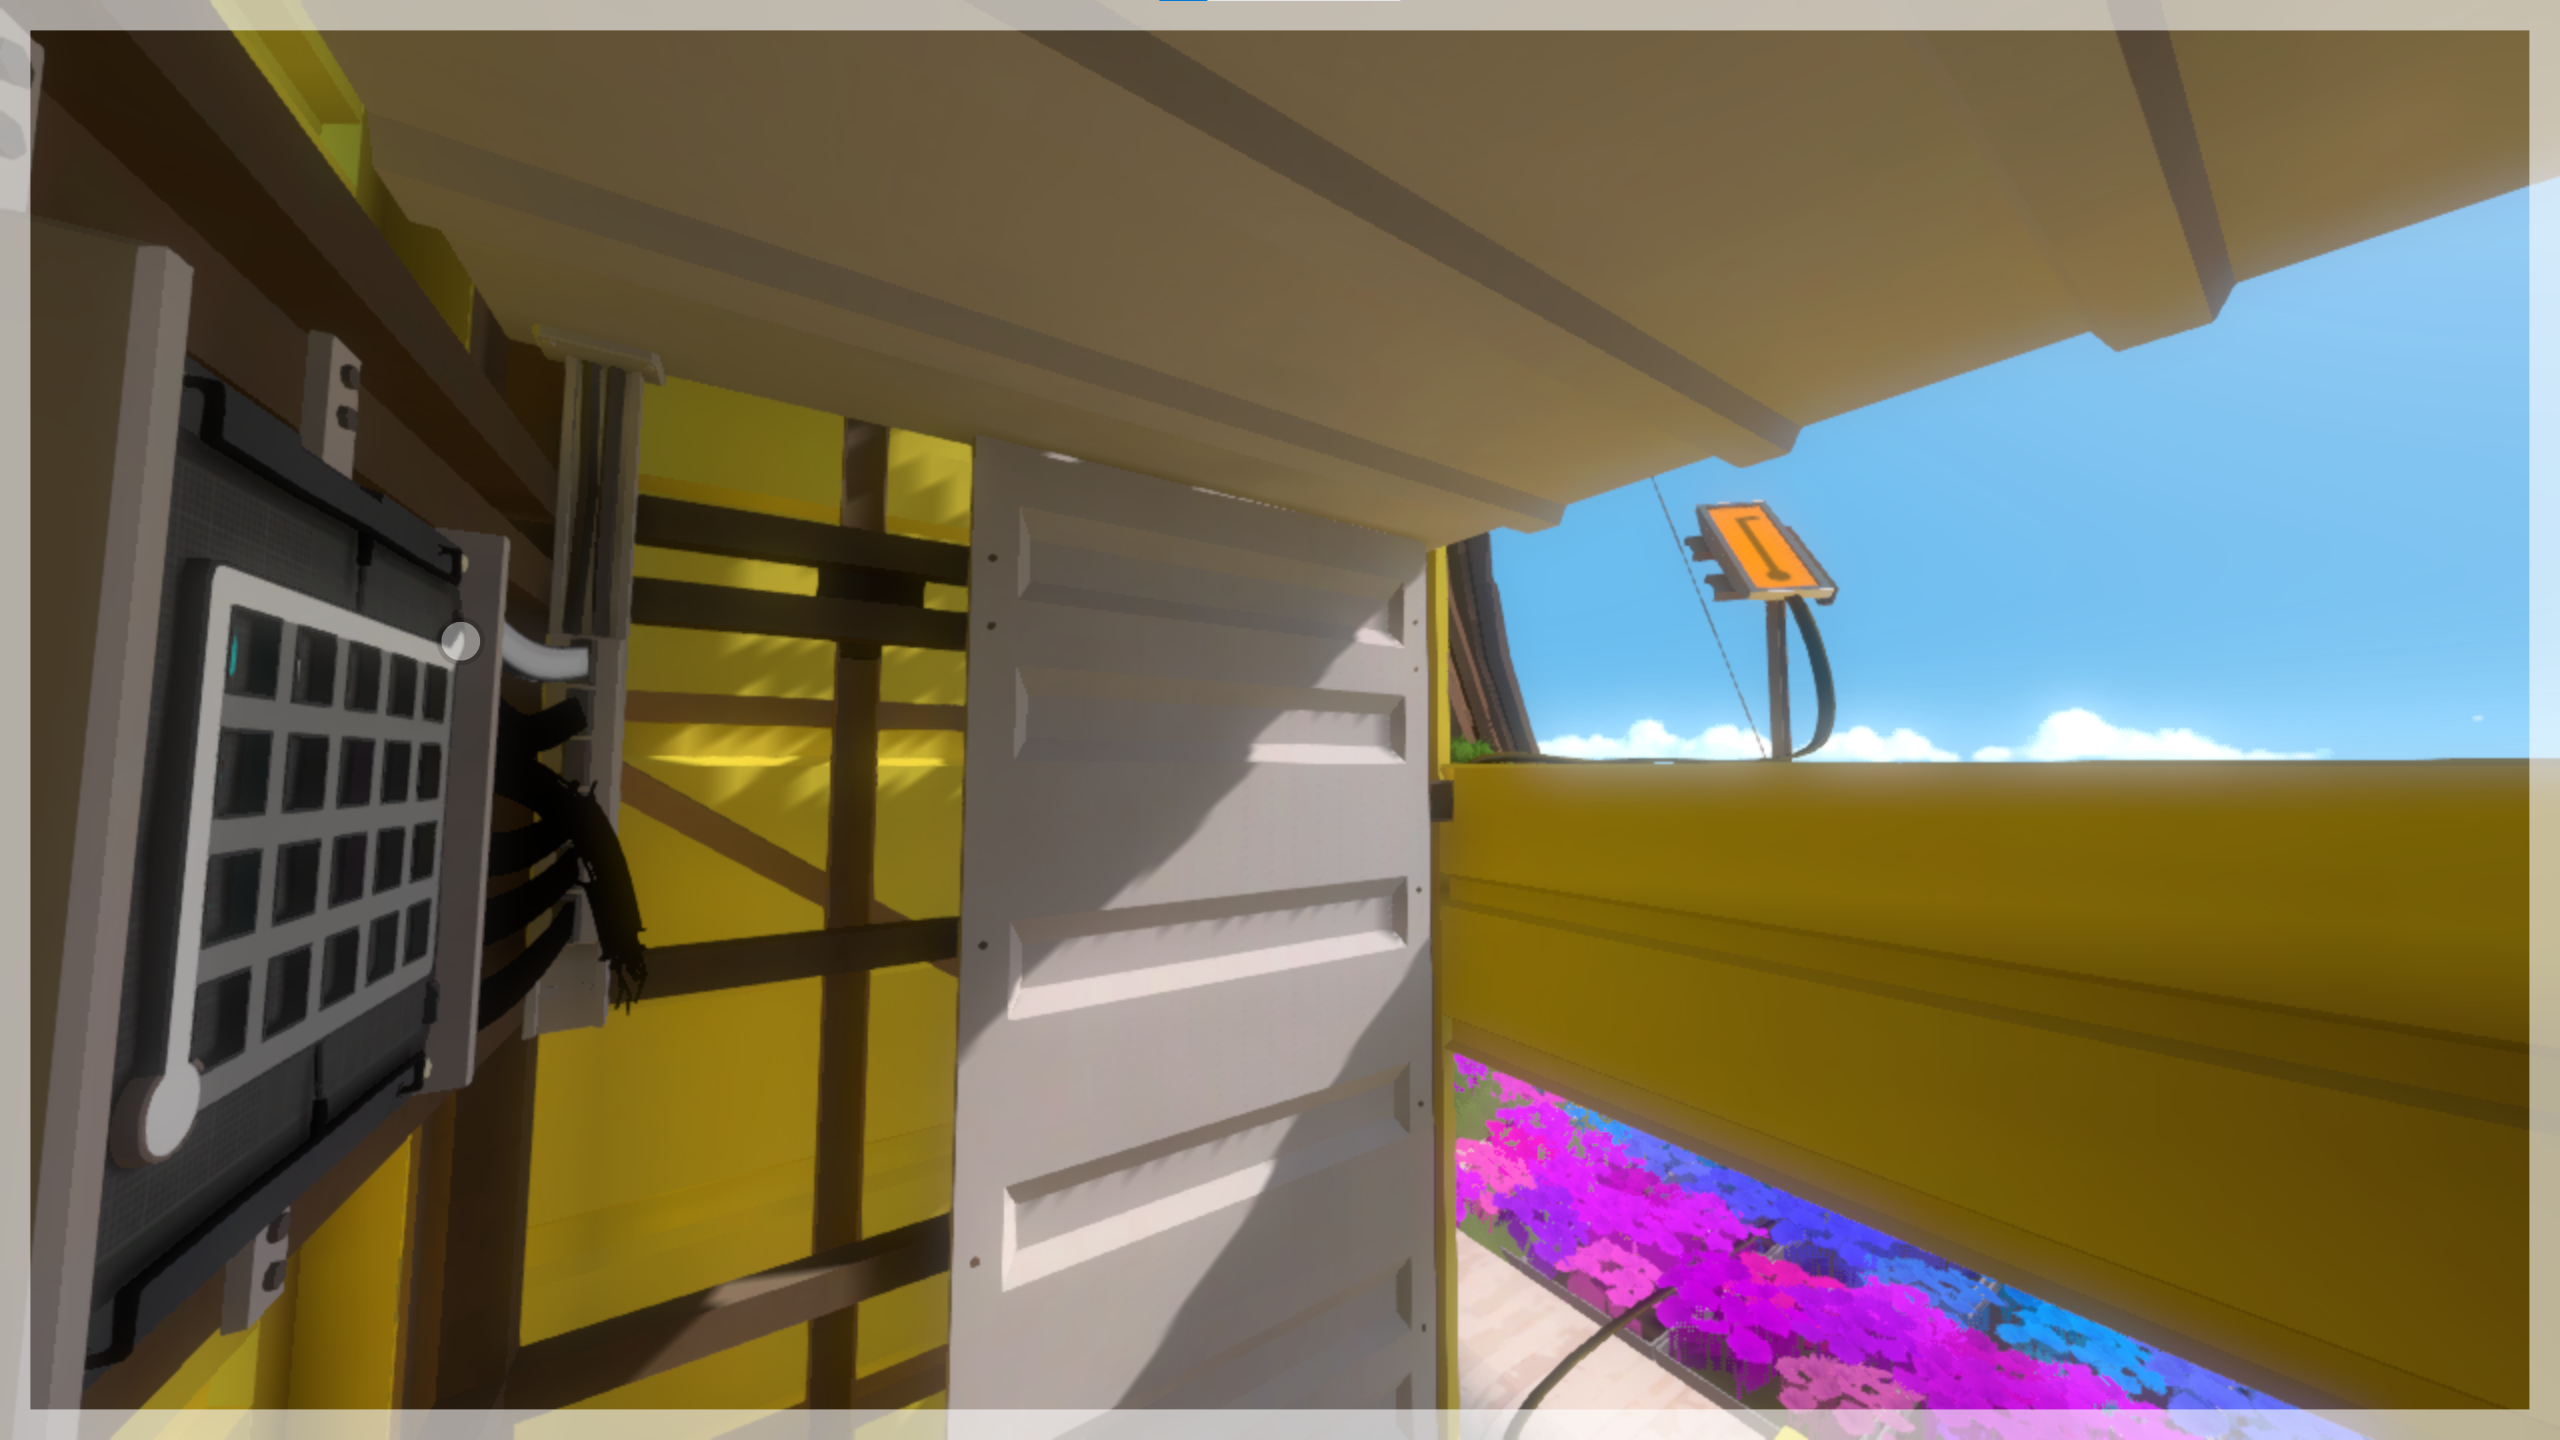
Tutorial goes nice and smoothly, but once we step into Town, we're presented with our first problem. The mining building has a panel with an eraser puzzle on it, and that puzzle opens one of the tower doors, meaning that we need to solve that panel. However, if you remember from earlier, eraser puzzles will never kick you out of solve mode automatically.
This introduces us to one of our most important tools when it comes to finding ways out of solve mode: sniping. If an important panel doesn't give us an automatic exit, see if you can snipe a panel that will. Here you can see the eraser puzzle in question on the right, and on the left in the background, the cursor solving a panel that will kick us out of solve mode:
That snag is easily solved, but it's not the only stumbling point in Town. There's a puzzle we call Town Triple because you have to solve it three times, and it's a problem because solving a panel more than once is one of the things that prevents you from getting an automatic solve mode exit. We can do the first solution just fine, and it'll kick us out of solve mode, but then we have to enter it again and input the other two solutions, after which we're stuck in solve mode.
This has a similar solution to the first problem: snipe something! There's a fun thing we can do here, which takes advantage of the way this puzzle is designed. The three solutions to this puzzle are revealed by standing in three different positions, although you can input them all from one place. One of the solutions is revealed while standing on the roof, which means there's a hole in the roof through which you can solve the puzzle. And the puzzle that gets activated by inputting all three of these solutions is also on the roof, albeit facing somewhat away from you. So, it's possible for you to stand near this hole, input the three solutions, and then solve the red hexagonal panel in order to get out of solve mode. The not-so-fun part of this is that the red hexagonal panel is one of the worst panels to solve in the entire game even if you're looking right at it, so doing it at this oblique angle can be a tall task. But if it gets us out of solve mode, we'll take it!
That's it for Town. Next is Monastery, which is straightforward, and then Jungle and Bunker, which we do interleaved in order to save time waiting for the Bunker Elevator. The first part of Jungle is fine, but Bunker isn't going to be as simple.
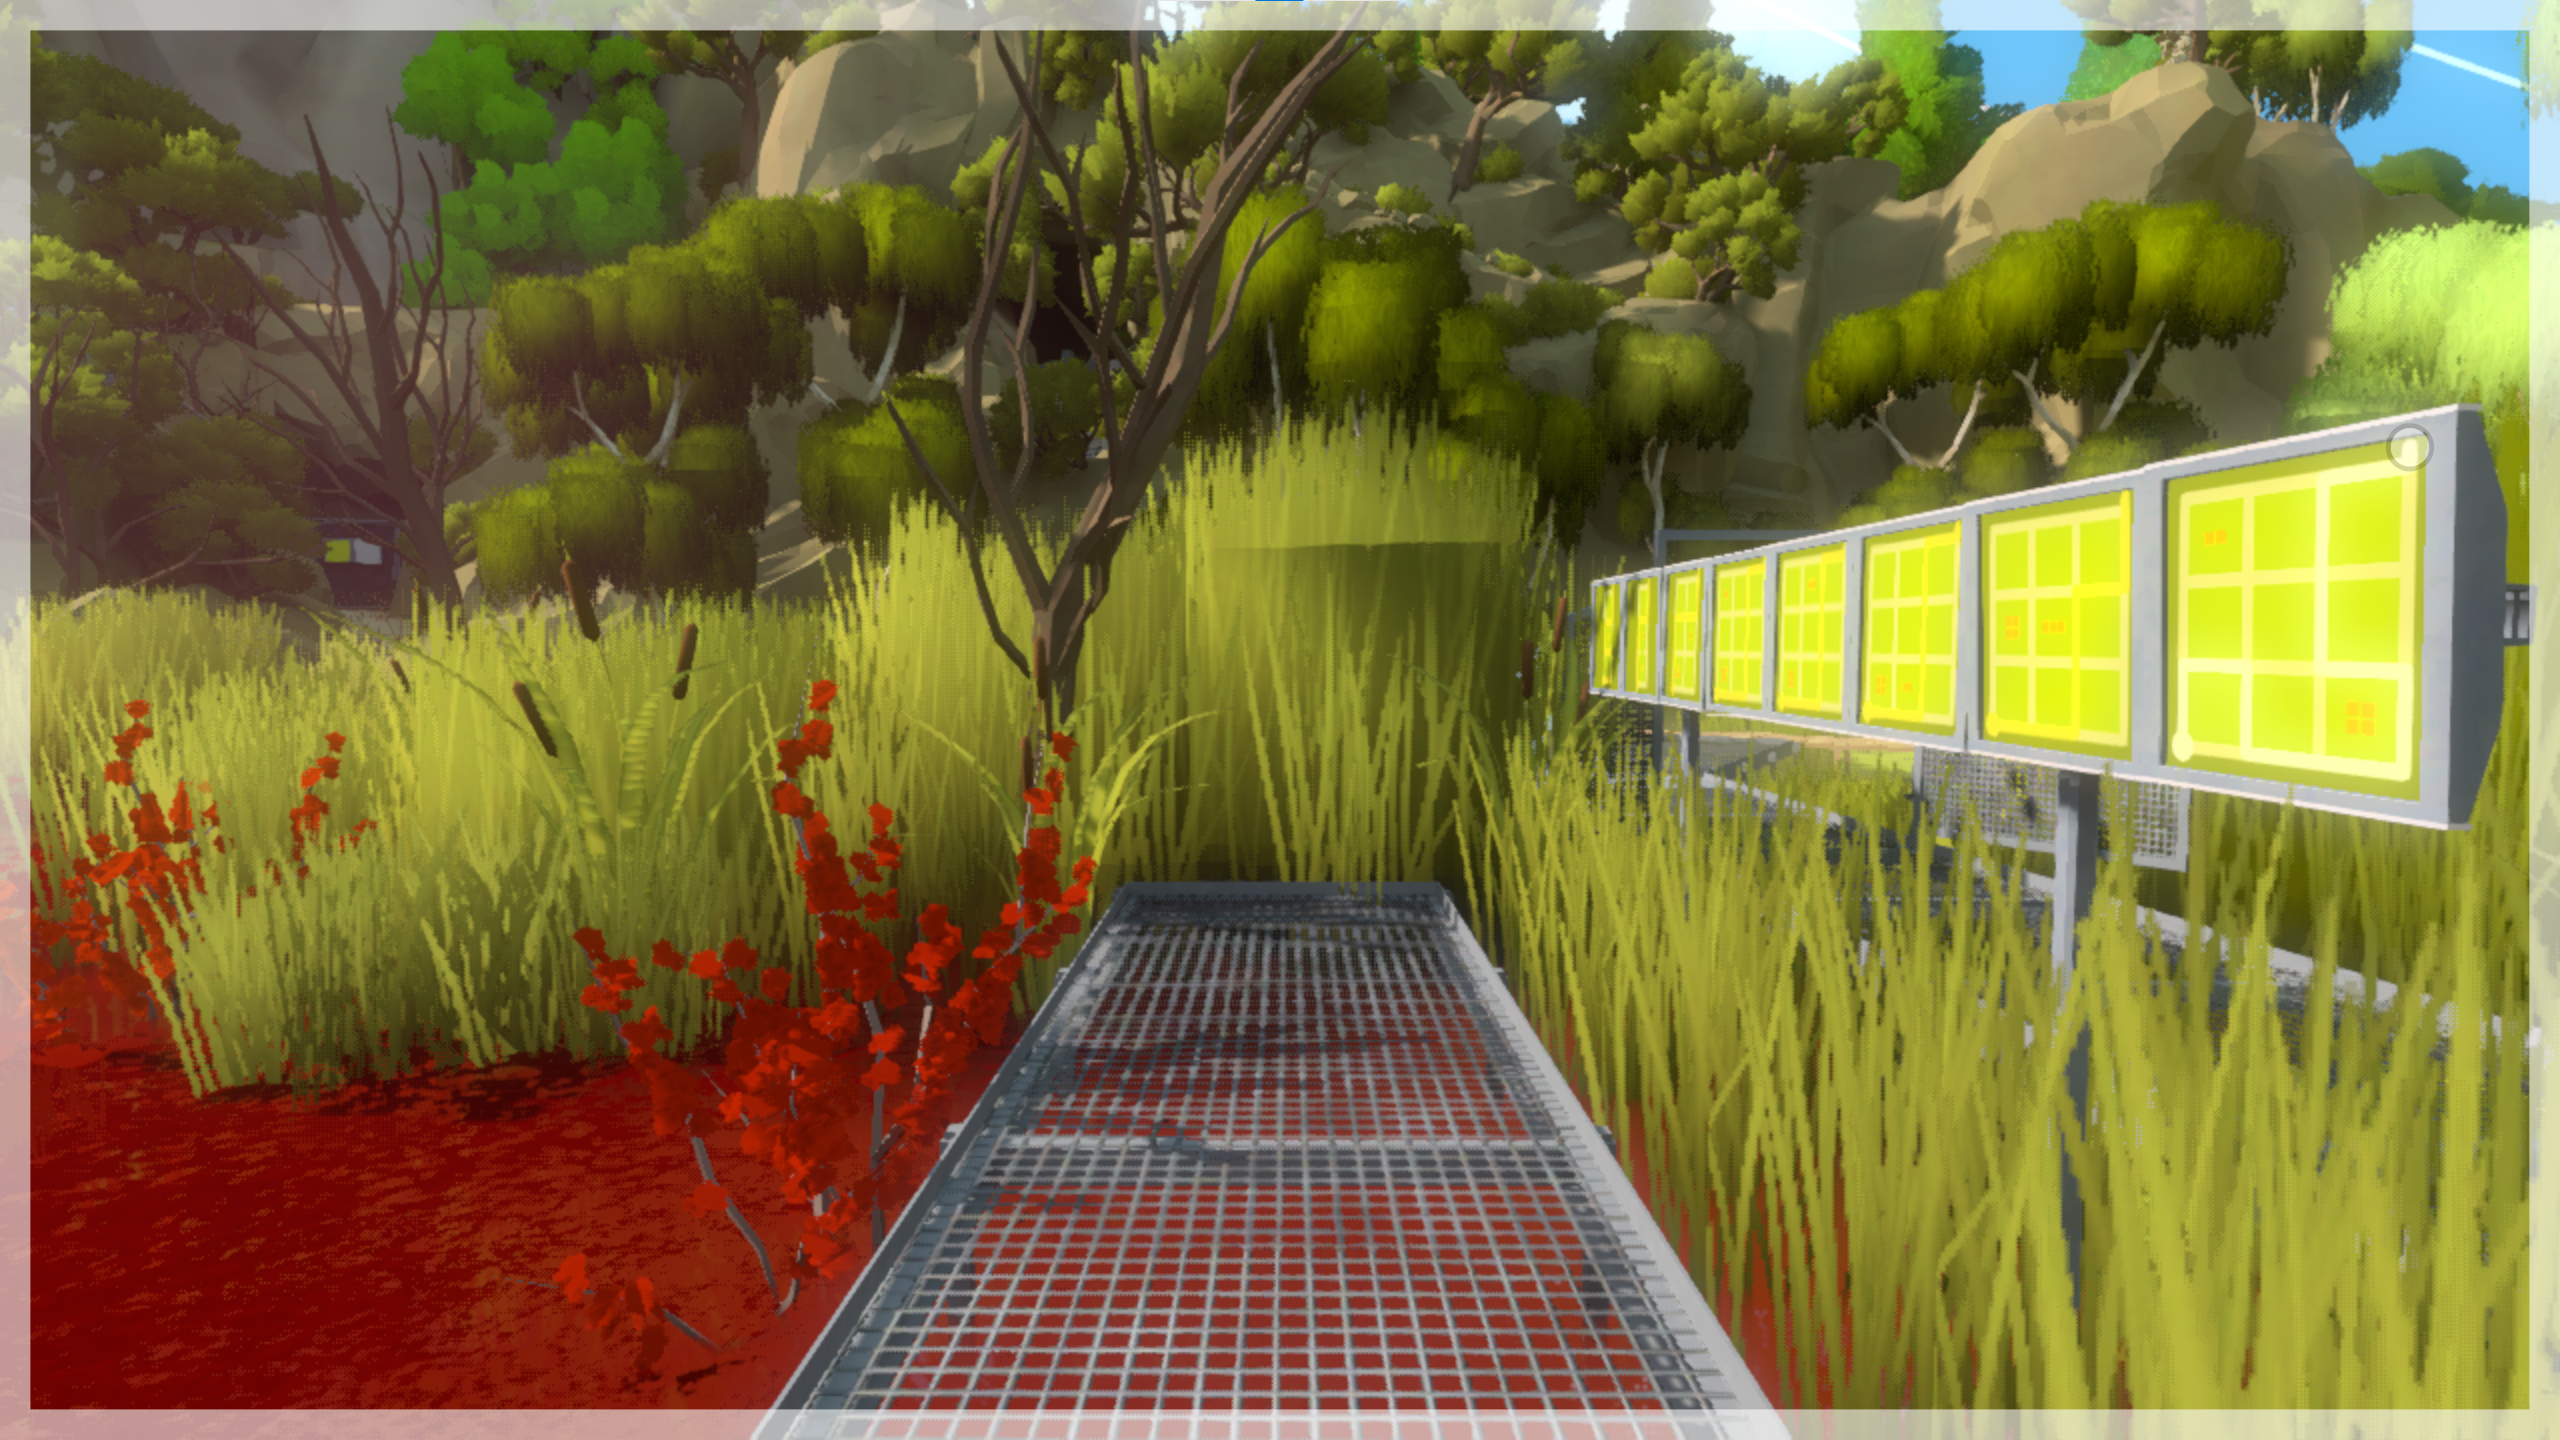
The first room of Bunker presents us with a new type of problem. There appears to be two sets of panels here: five on the left and four on the right. Unfortunately, the game actually considers this one continuous set of panels, and thus it won't kick you out of solve mode when you finish the fifth panel. You have to do all nine to get the automatic exit. As as you can see here, you can't stand in a way such that all nine panels are visible at once:
That's a front-on image of the room, but trust me, even if you stand all the way to the left, the rightmost panel is still obscured by the flowers.
This is also easily solved. The main characteristic of a panel set, other than the game not kicking you out of solve mode until you solve the whole set, is that if you are snapped into one of the panels, pressing the left and right movement keys will move you between the panels without leaving solve mode. Thus, what we can do is snap into the first panel in the set, and just move to the right after solving each one. After the fifth panel, you'll round the corner and be facing the first panel on the right wall. And you can just keep going until the end, which will kick you out of solve mode. Nice!
We then solve Bunker up until the elevator, and then detour out to do the rest of Jungle. There aren't any problems here, netting us another laser. We still have to go back and actually get the Bunker laser, though. And this does pose a problem, because it involves solving the elevator again.
The standard route for Bunker in most categories involves solving the elevator three times. Once, from within Bunker, to send it up to the penultimate floor. We then leave and go do Jungle while the elevator is moving. Next, we solve it from the penultimate floor to the top, where the laser is. And then, after activating the laser, we intentionally fail the panel so that the elevator moves down. We could technically remove one of those solves by just waiting inside the elevator the whole time as it goes up instead of doing Jungle in parallel, but that doesn't actually help us, because we still need to fail the panel at the top.
A view of the Bunker laser panel while standing in the elevator as it goes up. The cursor is drawing an invalid solution on the elevator panel, which will make the elevator go down.
This problem is a bit trickier than the others, because at first it doesn't seem like there's anything you could do to get yourself out of solve mode after activating the laser and failing the elevator panel. Whether you stand on the left or the right side of it, there's nothing solvable outside of the elevator on any of the floors. You're stuck riding it to the bottom floor, where you'll stay, forever entombed by the flowers.
Except there is something that can kick you out of solve mode, and it's staring you right in the face.
The laser.
What we do is turn the FOV way up and stand in the corner of the elevator like the screenshot shows. We wait for the elevator to rise enough that we get a good view of the laser panel. We fail the elevator control so that it starts descending, and then we activate the laser. This kicks us out of solve mode, and we can step out of the elevator once it reaches the open air floor. Horray!
Next is Shadows and Keep. If you're familiar with the Current 7 Lasers route, it might seem weird that we're doing them so late. It's because I'm describing the Legacy route, which shuffles things around a little bit because it's unable to do Jungle Wall Skip. If you're following along and are interested in doing this run on Current, you can easily rearrange the lasers so it goes Town -> Jungle/Bunker -> Monastery -> Shadows -> Keep -> Swamp. The fact that I'm talking about version differences is important, though, so keep that thought in your pocket! Anyway, Shadows and Keep are pretty simple and don't pose any problems. It should be noted, however, that we have to do the back half of Keep rather than the front (which is faster). The reason for this will also be explained later.
We only need one more laser to get into the Mountain: Swamp. Swamp pretty famously has a huge skip in it. You snipe two panels from the entrance, and it lets you walk right to the laser. This might lead you to believe that there's not as much room here for problems to arise, but alas, that would be a fallacy. The snipe itself is the problem.
The weird thing about Swamp Snipe is that while the two panels you need to snipe are in a set, both panels cannot be visible at the same time. There's always a tree branch in front of one of them. Players position themselves such that the first panel is visible, snipe it, then exit solve mode and move to the left so that the second panel is visible. This unfortunately doesn't work for us, because we want to minimize manual solve mode exits.
I find this problem kind of funny, because it's like an inversion of the first couple of problems we encountered. Instead of solving a close panel and sniping something to get out of solve mode, here we are sniping something and then solving something close up. The Swamp entrance area has 14 panels split into two sets that teach you the shapers mechanic. The entire second set is right next to you in the position you stand to do Swamp Snipe. So, the way we get out of this mess is to solve the first tutorial set, then snipe the first laser shortcut panel, solve the second tutorial set to get out of solve mode, and finally move into position to snipe the second laser shortcut panel.
Here, we're standing in position to snipe the first laser shortcut panel, seen in the distance on the left. The second panel is partially obscured by a tree. Luckily, there's a panel set right next to you that you can solve to get out of solve mode.
That finally brings us to the final area: Mountain. And by "finally", I mean we've only just begun. Mountain makes us for a solid 50% of what I want to talk about in this category.
Mountaintop
The very first Mountain puzzle immediately presents a problem. The Mountaintop Perspective puzzle, for those unaware, needs to be solved three times, each from a different standing position. The fact that you can't stand in the same place for any of the solutions means that we can't quite do what we did for Town Triple. We need three ways to get out of solve mode this time.
Luckily, we do have some resources to work with. We have a free automatic exit for solving the puzzle the first time, so there's only really two we have to worry about. And unlike other sticky situations, we're not trapped inside a small room with no options. There's a number of things to play around with on the Mountaintop itself, which we can take inventory of while enjoying that lovely view of the whole island. You really can see a lot of the world from up there. Some categories even snipe things from up there.
Speaking of which...
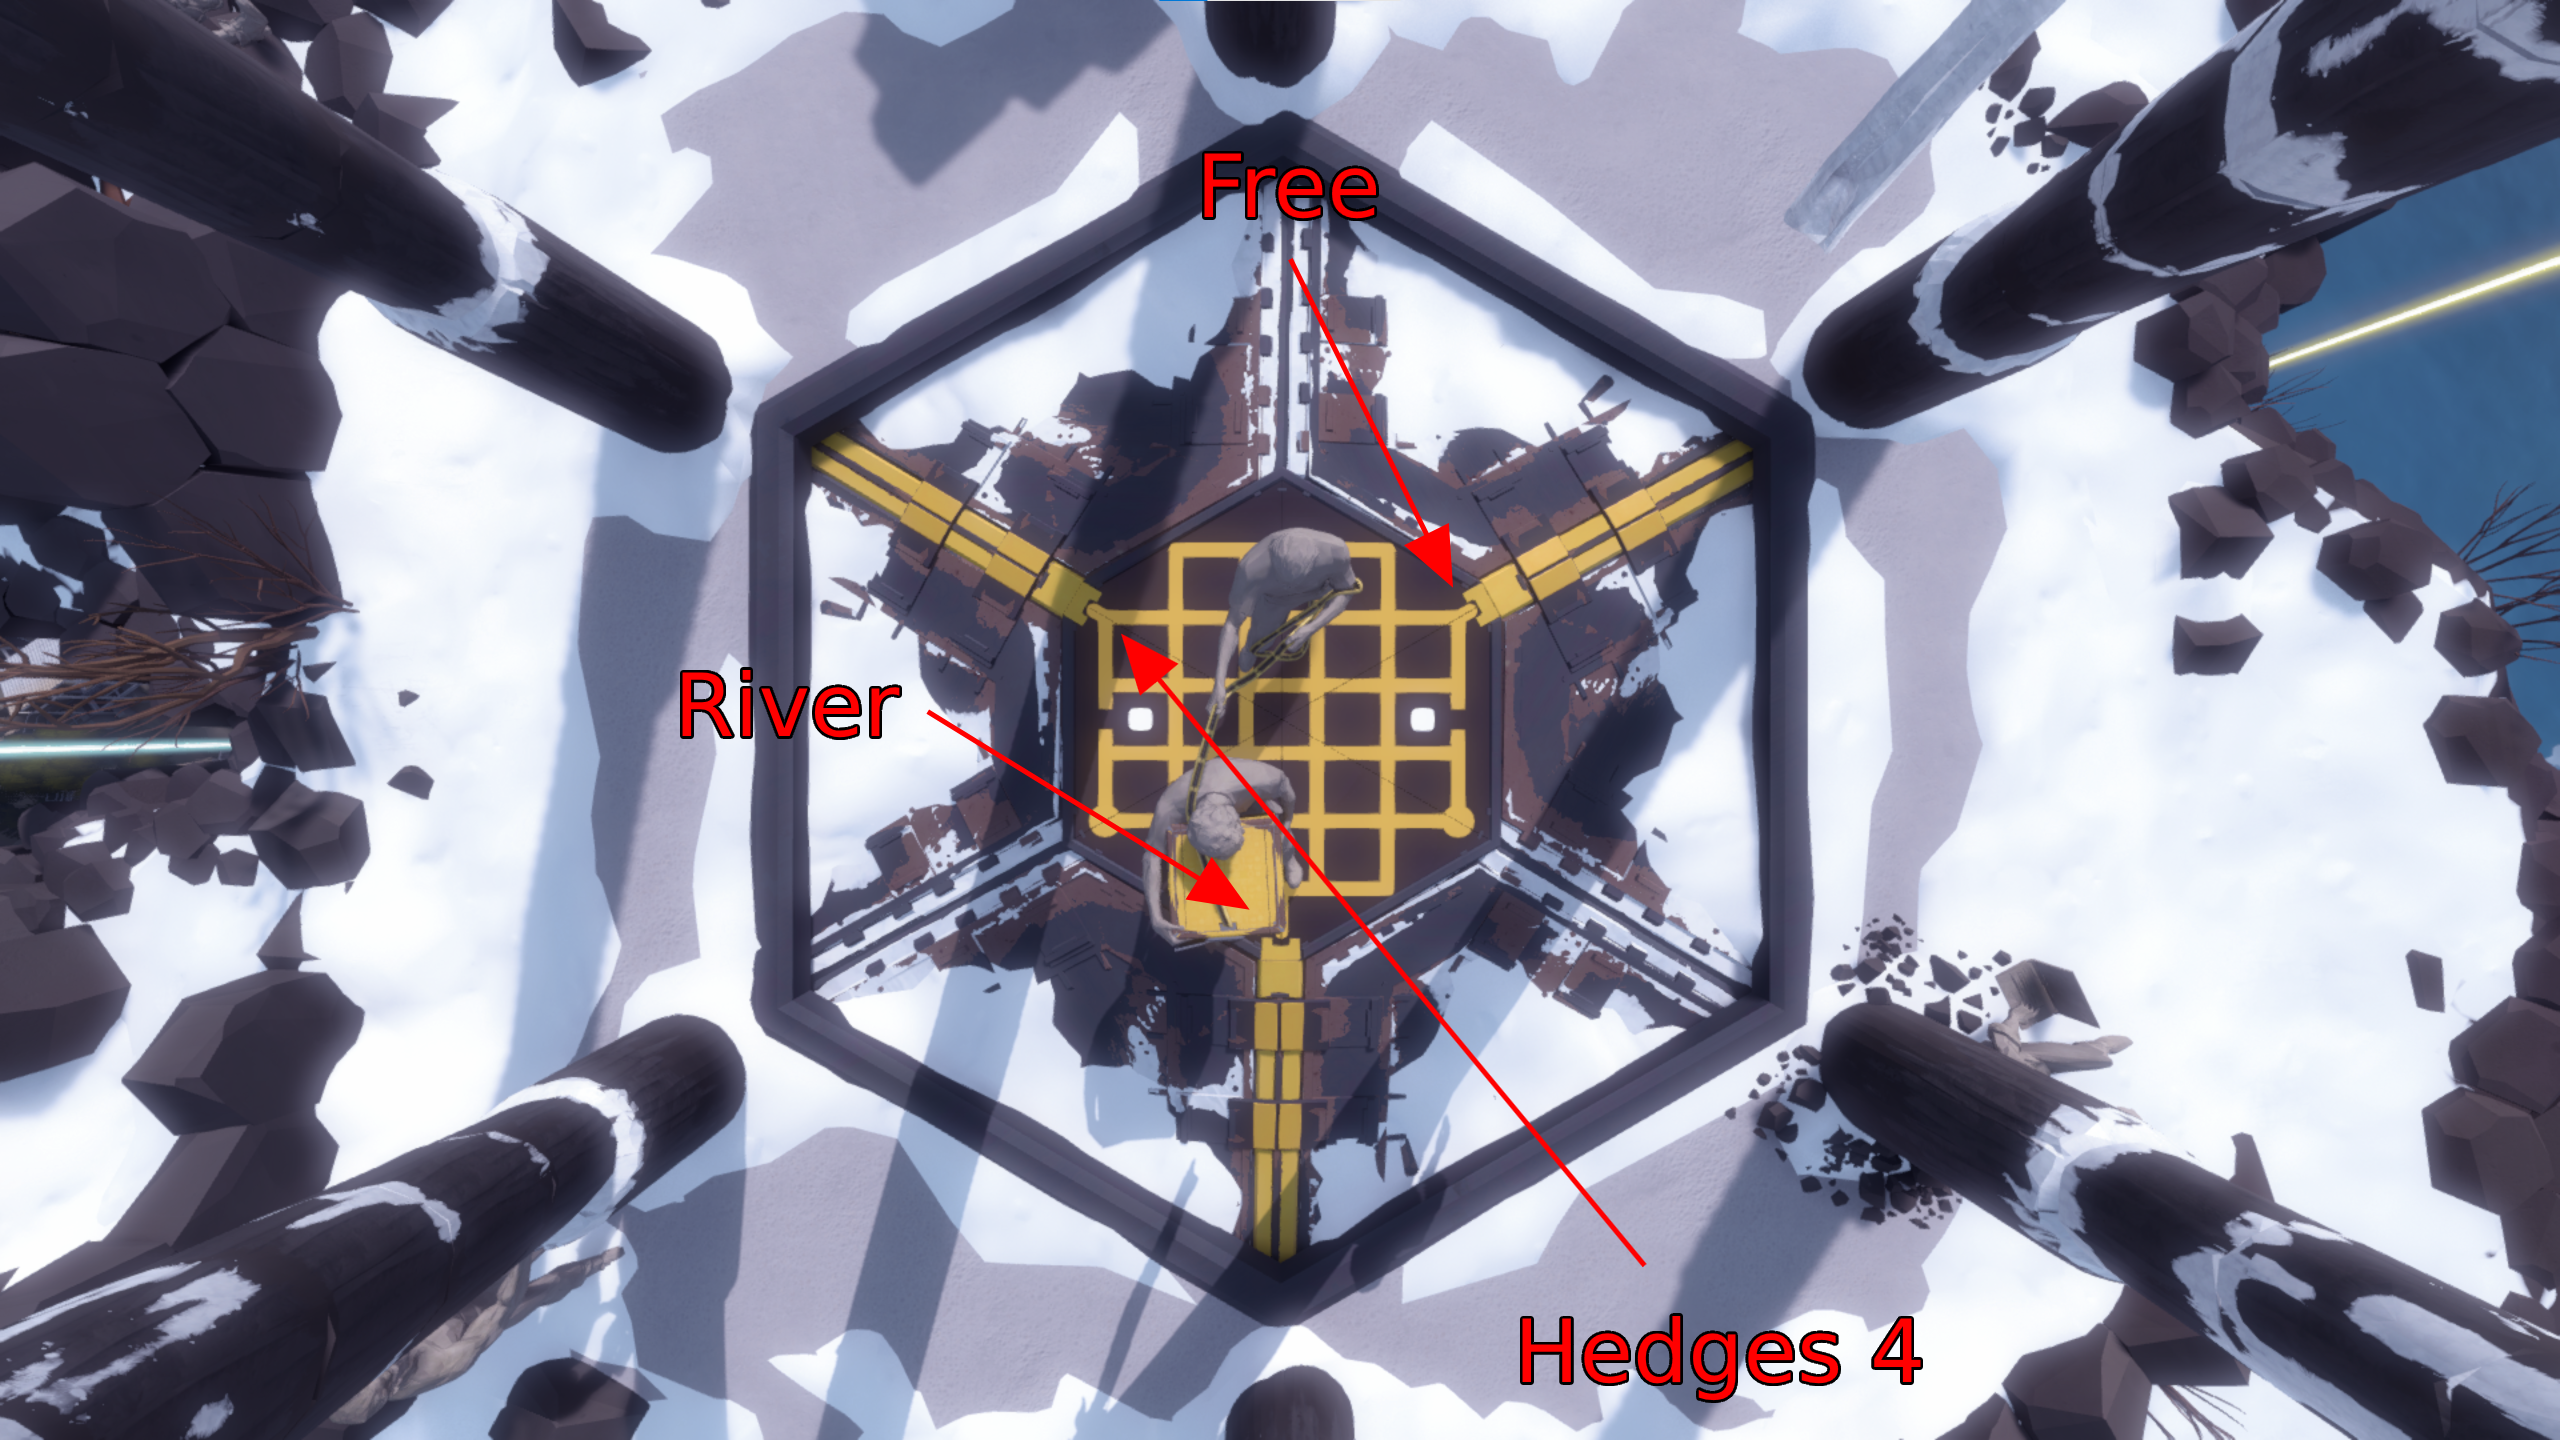
The three positions you need to stand in are behind the puzzle, on the left side of it, and in front of it. The behind solution is pretty restricted. You're facing the rest of the island, but it's pretty much all blocked by the mountain itself. There's an EP above you, but it's too high up. Even if you could get into a position where both the puzzle was solvable and the EP start lined up, the viewport isn't tall enough to be able to see both at once. The only panel in sight is the River panel, and there is a precise position where you can solve both. But let's put a pin in that for a moment.
The solution from the left is even more restricted. Now you're facing away from the island, there's no EP anywhere nearby, and you don't have much wiggle room in your standing position, especially on Old Versions before April 4th. However, the River panel is also visible from here if you're at a high FOV, and you don't have to be in a precise position to see it. You can just focus on standing in the right place for the Perspective solve.
So, the plan is to use our free automatic exit on the behind solution, and use the River panel to get out after the left solution. But what about the front? Well, here's where things get crazy, because there's a standing position for the front solution where you can actually see some of the island.
Namely, the Keep. And what does the Keep have, that might be facing the Mountain? The hedge mazes!
It's possible to stand in a position where you can both do the front solution to the Perspective puzzle, and solve the fourth hedge maze panel. Which is great, because it means we have a way to get an automatic solve mode exit for all three Perspective solutions!
Here's a top-down diagram of the Perspective puzzle. There is an arrow pointing to each endpoint from the general area where you'd need to stand for the solution. The start of each arrow says what we do to get out of solve mode.
This is why you have to do the back of Keep to get the laser in this category; you need Hedges 4 to be unsolved when you reach the Mountaintop.
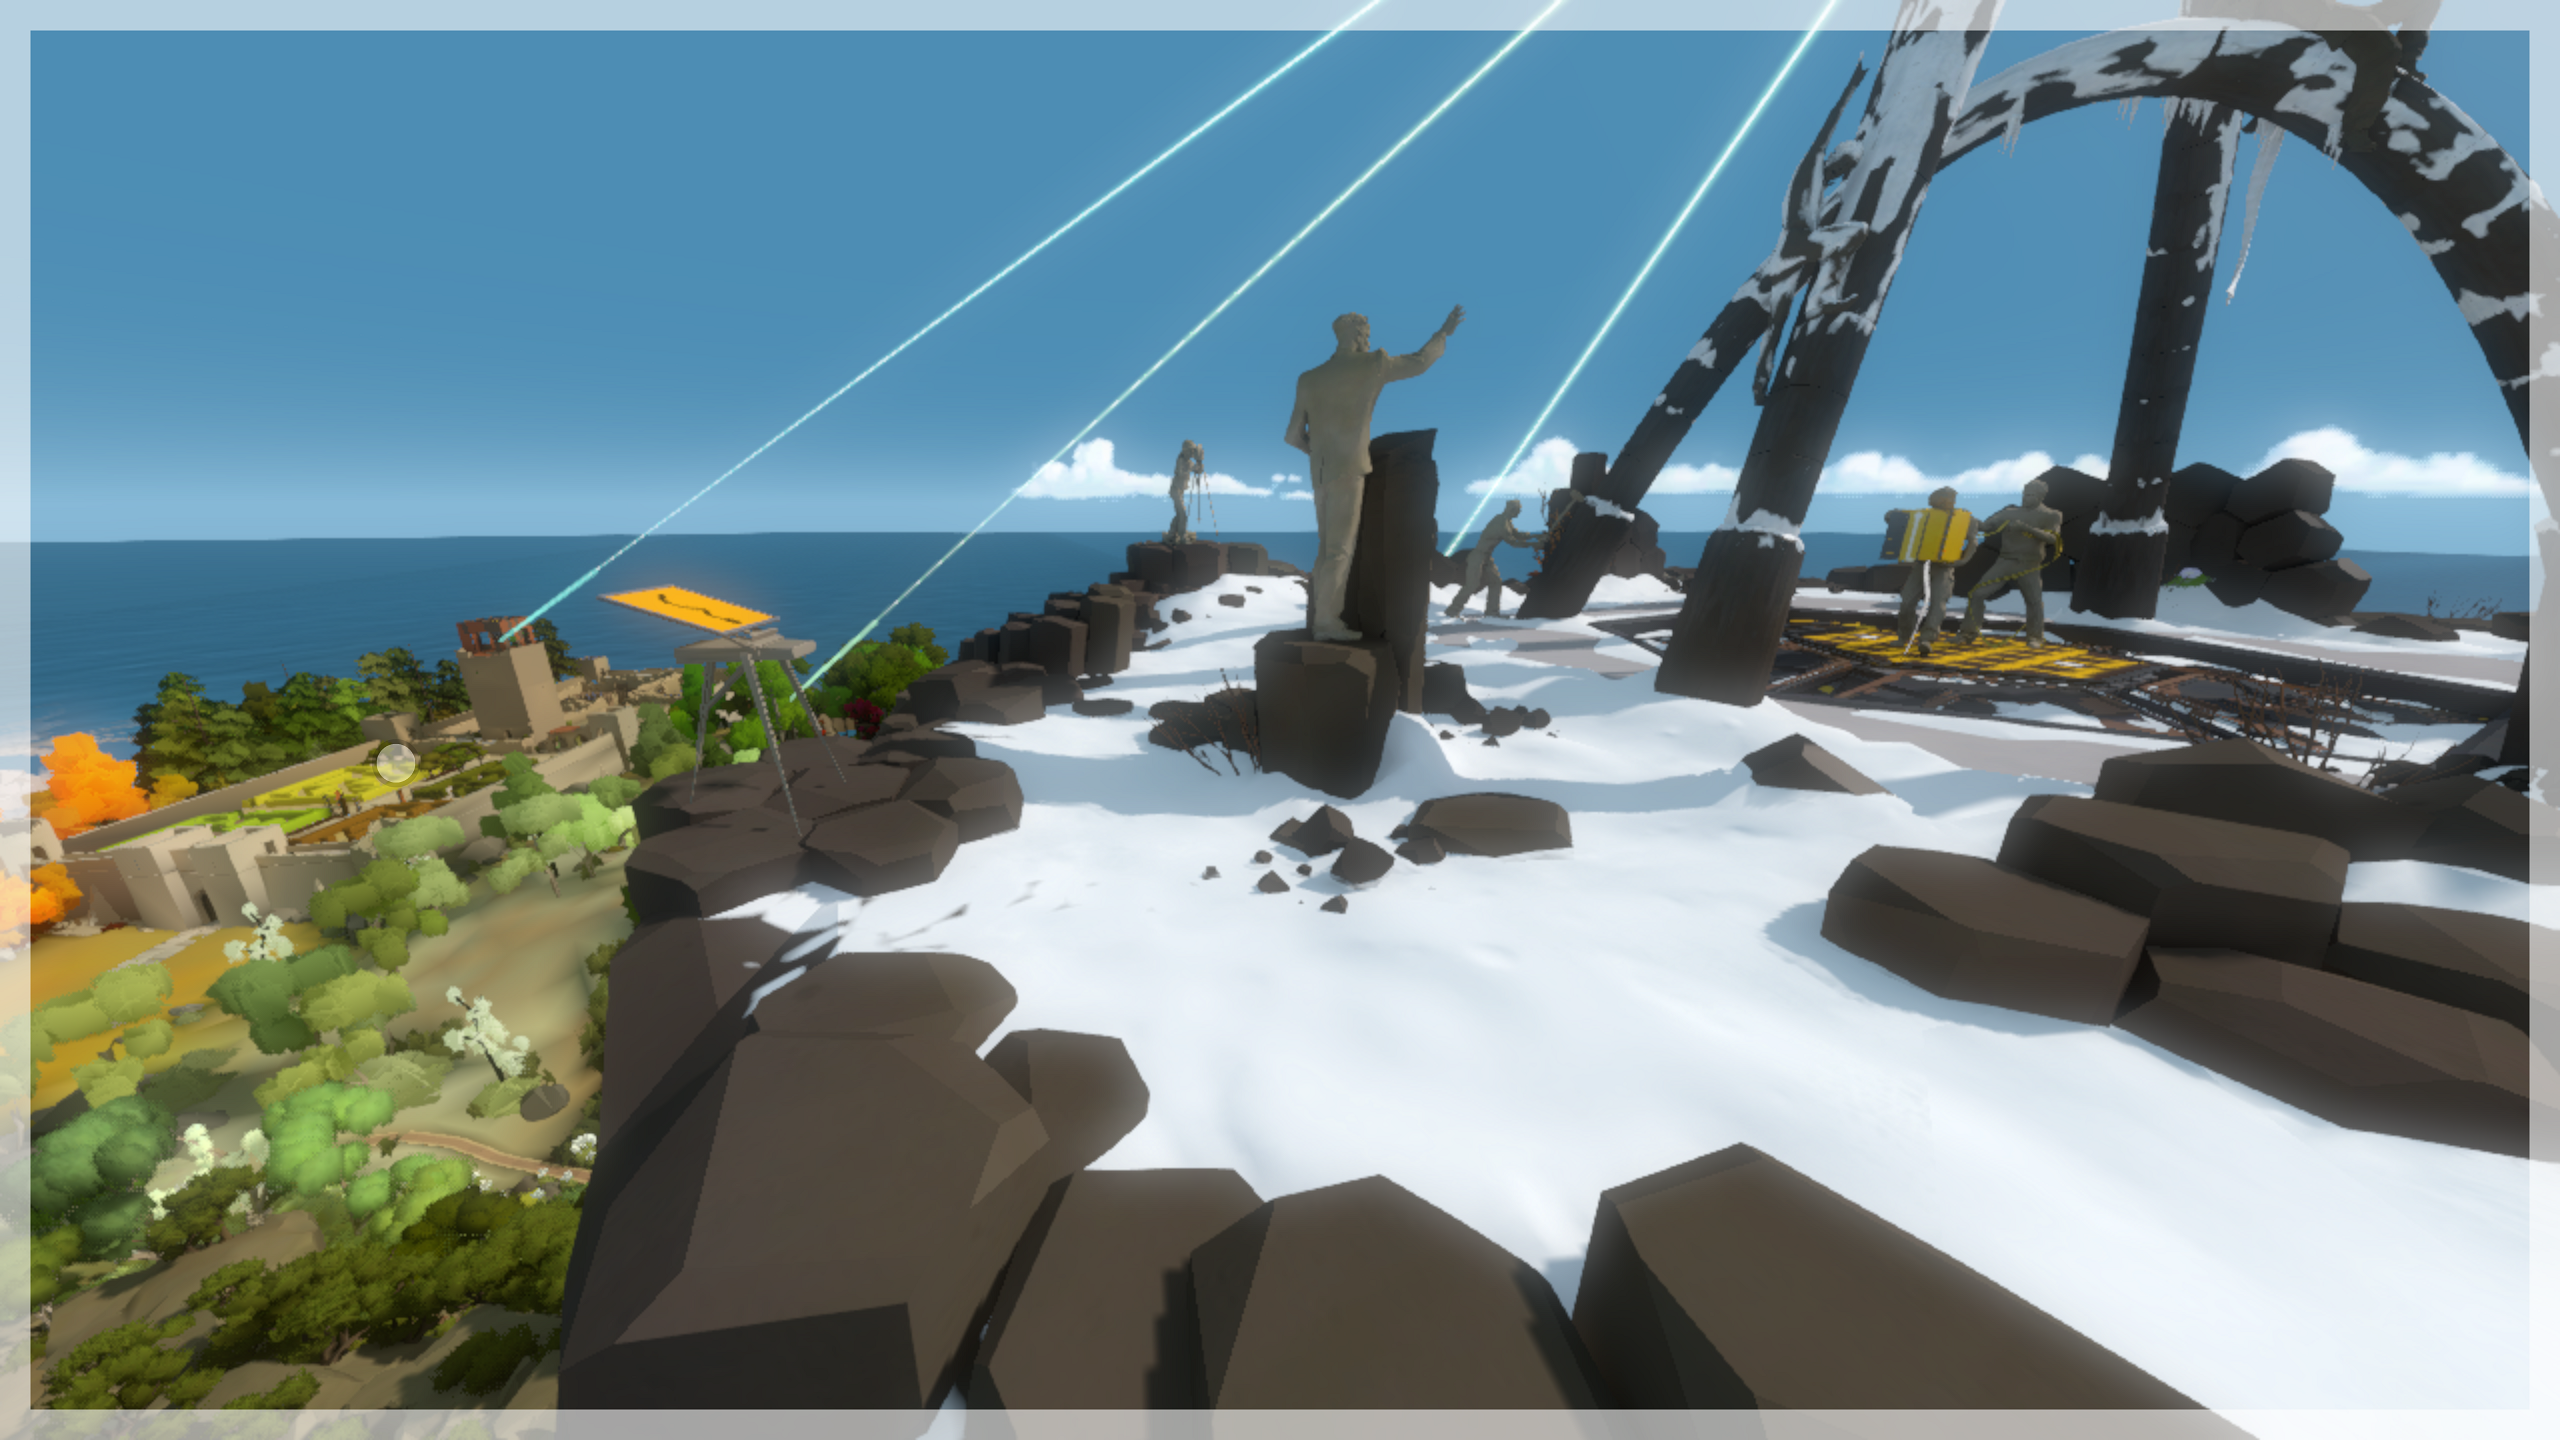
Great, right? Well, not entirely. The bad news is that the Hedges 4 snipe is 220 meters away. That's on par with Catwalk Snipe, one of the farthest known useful snipes, used to enter Challenge with zero lasers.1 Here, the player is standing in the position needed to solve both puzzles, with the cursor on Hedges 4. It is so far away that it is not even rendered.
This is what elevates the run into nightmare difficulty. You have one chance, 14 minutes into a run, to enter solve mode in a position where you can solve both panels. And even if you solve the Perspective puzzle, you then have to do this ridiculous snipe. I spend a minute and 24 seconds attempting this snipe in my run, which is a lot, but still relatively good -- it took six minutes in my All Lasers run. It's unfortunately not very fun to run a category that has an extremely difficult trick halfway through that you can't really find a consistent setup for. And that's why I haven't wanted to improve my Minimum Manual Solve Mode Exits times.
At least, that's how I felt before.
I had an idea while I was writing this post. I spent a lot of time studying Old Version and the changes in each update in order to write my post about the history of updates to The Witness, and all that stuff is still floating around in my head. I remembered something, a specific change I'd written about in one of the Old Versions, that impacted Mountaintop.
I had to try something. So I closed Skype, since the person I was waiting for a call from was half an hour late and it didn't seem like they were going to show up, and I opened The Witness. And I experimented.
Before the February 15th update, there was an alternate solution to one of the Perspective endpoints; specifically, the one that you'd usually solve standing behind the puzzle. This solution could be input while standing in front of the puzzle, but from the left, rather than the right like the one we use Hedges 4 to get out of. And the interesting thing about that is that there's something in that front left part of the Mountaintop, something we haven't talked about yet.
An audio log.
I mentioned before that clicking an audio log always kicks you out of solve mode, even if you've listened to the log before. This is a very important tool in our arsenal, and it's going to show up more later. But for now, the idea is that we could use our free solve on the front solution, the River panel on the left one again, and then the audio log for the back solution, using the exploit that allows us to input it from the front.
Here's an updated diagram showing the new route:
The only sticking point with that is that we need a high FOV to be able to see both the puzzle and the audio log at the same time. We actually need to make sure we can get a high FOV for a bunch of other things too, a couple of which have already been mentioned. So we need to be careful when playing around with very old versions, because the game did not release with an FOV slider. You were originally locked in at an 84 degree field of view.
Thankfully, I have good news about this. The FOV slider was added in the second February 4th update, and the Mountaintop Perspective exploit was patched in the next update, on February 15th. This means that you can use this route to handle Mountaintop in zero right clicks by specifically playing on the second February 4th update, no earlier no later.
Both the perspective puzzle (with the exploited solution inputted) and the audio log on screen at the same time.
This is a fascinating find, to me. Picking which version to use is an important part of doing a Legacy run, but it's not usually this specific. If you're just doing a Legacy run to do a Legacy run, you can use any version. If the run needs to snipe audio logs, you can still do any version. And if you specifically want to use Force Bridge Skip or Keep Skip, you'd use something before April 4th. But this trick requires one exact version, because of the proximity of a new feature and a trick being patched out. It does unfortunately mean you have to play without a reticle, but that's survivable.
So, there's a pretty big difference between Legacy and Current in this category! They both pull off Mountaintop with zero right clicks, but it's significantly easier in Legacy since you can use the second February 4th update. You can also do the front of Keep to get the laser in this route, since you don't need Hedges 4 to be available for sniping later on. This saves something like 40 seconds over doing the back, which is pretty nice!
Floors 1 and 2
Now that we're finally inside Mountain, let's take a look at Floor 1. Most of the panel sets in here are fine and kick you out of solve mode in the way you'd expect, although if you usually do the Orange set in two parts (like I do), keep in mind that you have to do it all at once here.
There's something a bit weird about the Blue set, though. There's three panels and they aren't directly next to one another like with most sets. They also require standing in special positions to be able to solve them, because the gimmick is that they're partially obscured by solid objects. In New Version, solving each of these panels automatically kicks you out of solve mode, so Current runs get through this just fine. On Old Version, however, the first two panels do not do this. Which means we need to figure something out for Legacy runs.
Mountain is really where audio logs start to come to our aid. There's a table near the Blue panels that has an audio log on it, and it's clickable from both the position where you need to stand for Blue 1 and for Blue 2. This has the amusing effect of starting the recording and then immediately stopping it. It also means you may be able to save yourself if you accidentally mess up your lineup for those two panels, although if you get snapped into them, you're kind of out of luck.
The next stumbling point, on both Current and Legacy, is the Purple Bridge panel. You have to solve it twice: once to get to the Blue set, and a second time to get to the floor's exit. Panels needing multiple solves are a timeless struggle in this category, but once again we are saved by the fact that there's an audio log on the floor right next to the Purple Bridge panel. Classic!
Floor 2 is pretty spicy. Rainbow set goes fine, as does solving Blue Bridge. Multipanel is interesting because solving one of the panels over and over again appears to solve the rest of the set simultaneously. But just inputting all six solutions into the first panel like a normal run would do doesn't automatically exit solve mode. Your sixth solve has to actually be on the final panel in the set for some reason. You can do this by snapping into the set and sliding along as you solve, or by standing back so you can see the whole set at once.
The next thing you do is solve Orange Bridge. Once you do, you are confronted with a problem. A big one. Players familiar with this area of the game will know that you need to solve Blue Bridge three times and Orange Bridge twice in order to proceed to Floor 3. Whenever multiple solves are needed, we are confronted by strife. Blue Bridge's additional solves actually aren't a big problem because there is, once again, an audio log right next to the panel.
As for Orange Bridge? No such luck.
The Orange Bridge panel, like Blue Bridge, is inside a glass room, but this one has nothing in it. There's no way to snipe anything through the glass because it's solid, and too close for through-walls sniping. You can't snipe down the stairs either because there's invisible 2D collision where the stairs were; and even if you could, the only thing there is Multipanel, which you've already solved. There does not appear to be any way to get an automatic solve mode exit after the second Orange Bridge solve.
Unfortunately, this gives us our first required manual solve mode exit. We made it pretty far into the run before it happened, so it's a little sad that we couldn't make it the whole distance. But the only way to avoid that right click would be to somehow skip solving Orange Bridge a second time. Which is impossible, right?
Well, here's where things get kind of controversial.
There is a way to get to Floor 3 with only one solve each of Blue Bridge and Orange Bridge. If you've read my post about Force Bridge Skip, you might know where this is going. There is a bug on Old Versions prior to April 4th of 2016 where loading a file while solving a panel causes the solve to get canceled in the new file. This is important for us because the force bridge panels have special effects when you start solving and cancel solving them.
Basically, this is how the trick goes:
Solve Blue Bridge such that you can cross to the other side.
Cross the gap, solve Multipanel, and stand near Orange Bridge.
Load another file where you're standing near Blue Bridge.
Click into the Blue Bridge panel. The cable coming out of it will deactivate.
Pause and load the original file, without canceling your solve. The solve will automatically be canceled after the load finishes. This makes the bridge disappear, but the cable leading out of the panel will still be lit up because the trigger to turn it off already happened on the other file.
Solve Orange Bridge, for the first time, so that the entire panel is satisfied and it ends at the floor exit. This is the solution we use in 100%.
Enter the elevator. Tada! Only one Blue Bridge and Orange Bridge solve each.
Force Bridge Skip is pretty cool, and it does work in the second February 4th update, the one we're required to use for the easier Mountaintop. There's a couple of important things to note, though.
First, let's talk about step 3. How do we load a file where we're standing near Blue Bridge? We're only allowed to load files created during the current run, so one idea would be to get up to Blue Bridge and then start a second file from the beginning without restarting the timer and play all the way to Floor 2 again. There's an easier and faster way to do this, though: the game splits our save file every 120 points. So the idea would be to get our save file to split between solving Blue Bridge and finishing Multipanel.
In the post, I talk about how Force Bridge Skip doesn't really work out in 7 Lasers because we don't end up at Blue Bridge with enough points. But, we solve 16 extra panels in Minimum Manual Solve Mode Exits in order to get us out of sticky situations. This actually puts us perfectly in range for Force Bridge Skip with no extra work needed. 114 points before Blue Bridge, and 121 after Multipanel. So, we can actually make use of this trick to only have to solve each bridge once!
The second thing to note, however, is the big one. In Step 5, we pause the game while in solve mode, and we load a file. When the file finishes loading, we are no longer in solve mode.
Way back at the start of the post, I talked about what counts as an automatic solve mode exit and what counts as a manual exit. Loading a file is a weird edge case because it doesn't play the solve mode exit sound effect, but it's pretty clearly a free action that can be used with the specific intention of exiting solve mode. But Force Bridge Skip requires loading a file while in solve mode. So how is that allowed?
Well, it's kind of up to you whether it's allowed.
Categories like this are pretty arbitrary. We can decide what is and isn't allowed in order to make a better run. In this case, a few of us decided that it would be more fun to allow Force Bridge Skip, and say that the load in Step 5 doesn't count as a manual exit. There's a bunch of justifications you can give for this: "the file isn't loaded with the specific intention of exiting solve mode", or "the manual exit doesn't happen on the file that completes the run", or even "we could automatically exit solve mode without loading the file anyway because there's an audio log near Blue Bridge". For me, the justification is "I wanted to get to use Force Bridge Skip in another category."
And also "I didn't want to be forced to right click so close to the end of the run."
Conclusion
Regardless of whether this trick counts or not, getting past Orange Bridge means we can move on to Floor 3. It starts off with a monstrosity referred to as either Giant Floor or Metapuzzle, based on whether you run vanilla or randomizer. It is one large panel containing four smaller panels, which, when solved, become elements in the larger puzzle. It's pretty cool, but importantly for us, the sub-panels all have erasers.
This is barely an issue though because the metapuzzle itself doesn't have any erasers. You just have to stand in a position with a high enough FOV to be able to see the sub-panels as well as the full floor, then solve the sub-panels, and use the full floor to exit solve mode. And there we go! We've finished the run!
Really. After Metapuzzle is Random Doors, which aren't a problem, and then Pillar Room, which also isn't a problem. All of these panels individually kick you out of solve mode, including the three panels in the Wonkavator. Just make sure you don't enter solve mode before getting into position to solve the next puzzle, because I have lost a run of this category by entering solve mode in Pillar Room and facing the wrong way.
But that's it. We launch the Wonkavator, and we're off to the stars.
Overall, this challenge went pretty well. In Current, you're forced to do one manual solve mode exit, after the second Orange Bridge solve. In Legacy, it depends on whether you believe Force Bridge Skip should be allowed. If you don't, then you're also forced to do one manual solve mode exit: either the second Orange Bridge solve, or during Force Bridge Skip. If you do believe Force Bridge Skip should be allowed, then I am pleased to say that 7 Lasers can be done with no manual solve mode exits in Legacy!
Here's a breakdown of the different issues we ran into:
Movement needed within set: 3 (Bunker First Floor, Swamp Snipe, Mountain Blue)
This post has gotten quite long, so I'm going to end it here and write a followup later. There's a lot more to say about this challenge, since we haven't touched All Lasers or All Panels yet. You'll also learn about a trick that was discovered during the writing of this post (so, a year ago), called Solve Walking. Stay tuned!
The farthest useful snipe I can think of right now is Tutorial Discard from Mountaintop, which is a through-walls snipe, is 270 meters away, and would save one panel in All Discarded Panels Low%. Nobody has performed a run that used it, though. ↩


Comments